top of page
T J Vanderloop, Tech-Education & Mfg-Associates, LLC
Cell Phone 715-308-0516 tjvanderloop@gmail.com
Manufacturing Engineering Technology & Vocational Education Work-skills,
Strengthen the Skills-gap by Building a World-Class Workforce

Mailing Address:
Thomas J. Vanderloop
E5464 770th Avenue
Menomonie, Wisconsin 54751
Let's talk shop! (Tom Vanderloop, Cell Phone: 715-308-0516)


Mailing Address:
T. J. Vanderloop
E5464 770th Avenue
Menomonie, Wisconsin 54751

Marvelous Measurements (All about Rubrics)
If you can measure that of which you speak, and can express it by a number, you know something about your subject; but if you cannot measure it, your knowledge is meager and unsatisfactory.
-Lord Kelvin, Physicist (1824 - 1907)


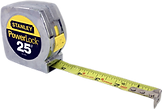
Internet Images from Stanley Tools, Starrett, Zeiss, & Schlenler Enterprises

Three Common Elements on a Working Drawing (Detailed CAD-Print):
1. All Lines Conventions define Functional Parts; or a Graphic Form as a 2D, or a 3D CAD-Parametric Model.
2. All Rubric - Numbers define Quality Control Units of Measurement, and a Manufacturing Cost;
Non-precision and Precision Measurements; Dimensioning & Tolerancing define Shop-floor Economics, and Metrics.
3. Company Notations & Standards: ASME, AISI, AGMA, ASTM, AWS, IEEE, SAE-Domestic (ANSI) or DIN, ISO, etc.
Modern Digital Product Notations define a Standard make-up for any Engineering Document or Detailed CAD-Print.
-Thomas J. Vanderloop, Author, & Technical Education-Instructor

A Steel Hat Bracket Applying Geometric Tolerancing
(The Front View is Balanced Inside-out off a Zero-origin and the Flat Stock is Outside-in)
NOTE Below the THREE COMMON ELEMENTS for PRINTS:
Line Conventions, Rubrics (Metrics), & Standard Notations
Andrew Carnegie, American Investor in Education & Leader of Positive Ideas
"Take away my people , but leave my factories, and soon grass will grow on the factory floors. Take away my factories, but leave my people, and soon we will have a new and better factory."
bottom of page